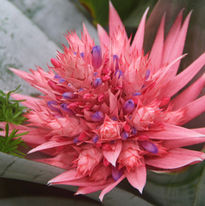


Bromancing with Bromeliads. Broaden Your love affair by growing from seed.
If you’ve ever pined over a collection of bromeliads with exotic colours, exquisite flowers, and exciting shapes, then you’ve definitely wanted to build a collection of your own. Sourcing all these plants can be expensive, and finding rare or exotic plants can be difficult. But there is another option to help you build your collection. Growing bromeliads from seeds is a cost-effective, challenging and rewarding way for you to grow your collection and broaden your bromeliad bromance.
Whilst you can harvest bromeliad seeds yourself, you're always going to be limited by the plants you have access to, and you can only harvest them when those plants are flowering and fruiting. This really restricts your ability to get new varieties.
Buying seeds from reputable retailers is the best way for you to grow your bromeliad collection by buying and germinating seeds of new varieties and species.
Bromeliad seeds generally don’t stay viable or ‘fresh’ for long, compared to other seeds, often only lasting 1- 4 months before they’re unusable.
Good storage and removing as much moisture from around the seeds will prolong their viability, and all good seed retailers will do this as part of their packaging. Therefore, buying seeds from reputable retailers is the only way to ensure that the seeds you’re buying will actually germinate for you. It’s then up to you to get the seeds into the ground ASAP!
When it comes to planting your bromeliad seeds, you want a planting medium that can retain moisture well, but be free draining so that your seeds don’t sit in water all the time. Blends of peat or coir and perlite at 1:1 fit this bill, as do sphagnum moss, vermiculite, and orchid potting mix.
Next is to find a container that you can use as your seedling tray. A container with some holes in the bottom and a clear lid are ideal, but you can also use plastic drink bottles cut in half and plastic wrap and elastic bands.
Fill up your containers with around 30mm of your potting mix and moisten the soil with some lightly soapy water. This will help your seeds stick when you plant them, and the soap helps with any hydrophobia in your potting medium.
When it’s time to sow your seeds, place them on top of the soil and gently push them down so that they’re making good contact with the medium, but make sure not to bury them with any soil. Cover the container up with the plastic cover and place it in a warm location where it can sit at around 22-26oC.
At this point, you want to maintain a warm and humid environment for your seeds to germinate. If you live in a warm region, you can achieve these temperatures by placing the containers in a sunny area with indirect light. If you live in a cold region, you may need to use heat lamps or warming pads.
You’ll also need to keep your potting medium moist, and you can do this by placing the containers in water, rather than overhead watering. The water will enter the containers through the drainage holes in the bottom, and you won’t disturb the seeds.
After 3 weeks, all your seeds should be germinated, and any that haven’t can be disposed of as duds. At this point, you can place the seedlings under artificial lights and begin to treat them like their adult counterparts. Care from here will depend on the species and its specific requirements, but it’s still smart to water through submersion of the container rather than overhead, just until the seedlings get a bit more sturdy.
When your seedlings are big enough to comfortably handle (around 6-8 weeks) you can begin to harden off your seedlings and separate them and pot them up as individuals. Once transplanted, you can begin to treat your seedling like an adult, but remember that it can take a few years before your plants reach maturity and begin to flower, so a little bit of extra TLC for the youngens won’t go astray.


